Woodworker's Journal 2004 Summer, страница 27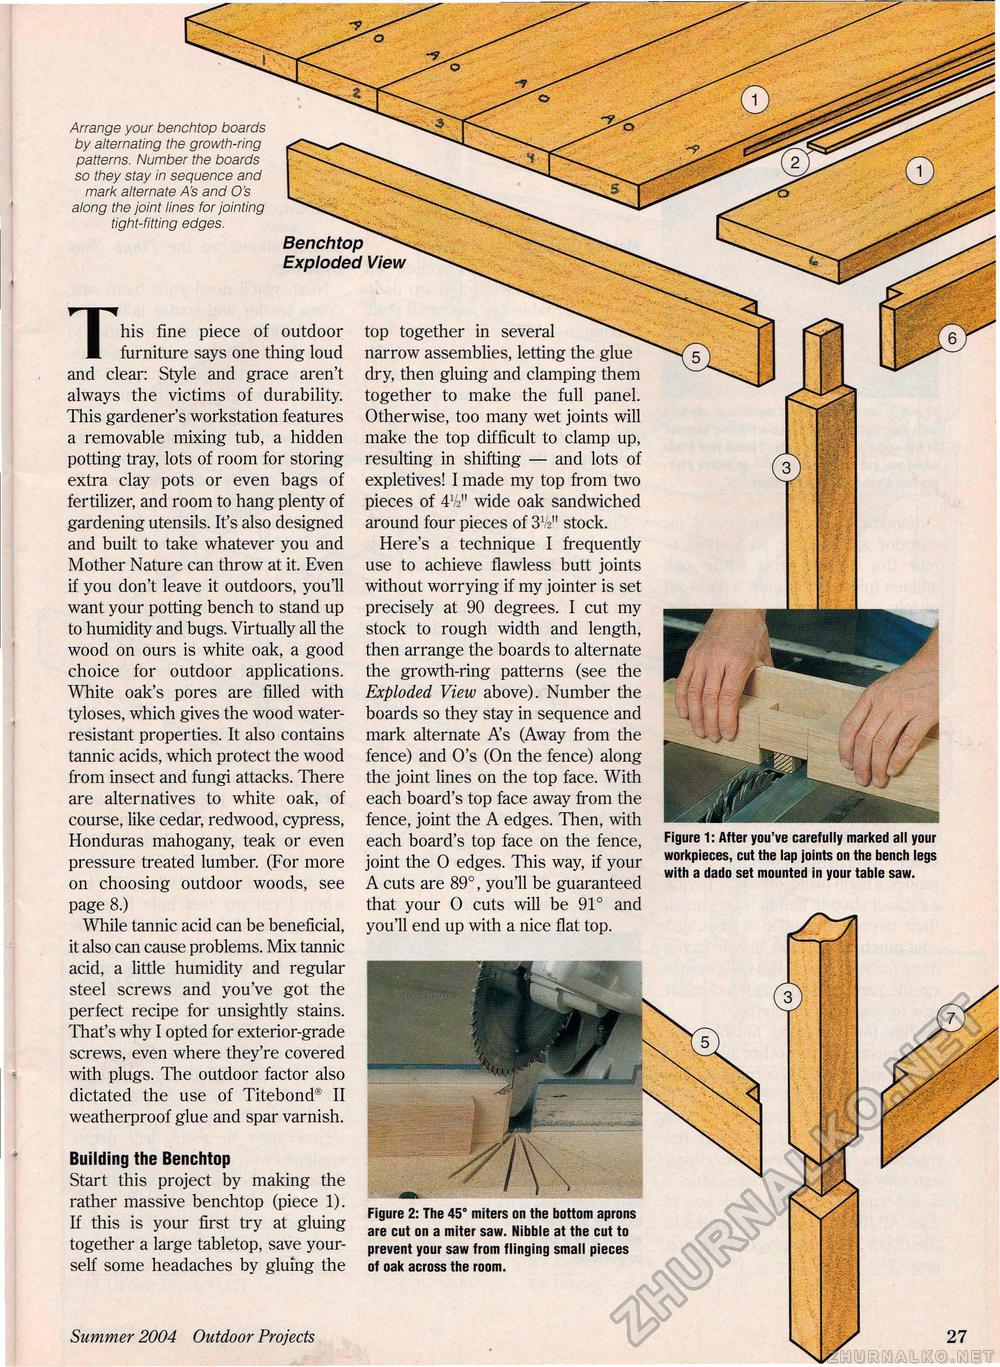
* Arrange your benchtop boards by alternating the growth-ring patterns. Number the boards so they stay in sequence and mark alternate /A's and O's along the joint lines for jointing tight-fitting edges. Benchtop \ Exploded View his fine piece of outdoor ft furniture says one thing loud and clear: Style and grace aren't always the victims of durability. This gardener's workstation features a removable mixing tub, a hidden potting tray, lots of room for storing extra clay pots or even bags of fertilizer, and room to hang plenty of gardening utensils. It's also designed and built to take whatever you and Mother Nature can throw at it. Even if you don't leave it outdoors, you'll want your potting bench to stand up to humidity and bugs. Virtually all the wood on ours is white oak, a good choice for outdoor applications. White oak's pores are filled with tyloses, which gives the wood water-resistant properties. It also contains tannic acids, which protect the wood from insect and fungi attacks. There are alternatives to white oak, of course, like cedar, redwood, cypress, Honduras mahogany, teak or even pressure treated lumber. (For more on choosing outdoor woods, see page 8.) While tannic acid can be beneficial, it also can cause problems. Mix tannic acid, a little humidity and regular steel screws and you've got the perfect recipe for unsightly stains. That's why I opted for exterior-grade screws, even where they're covered with plugs. The outdoor factor also dictated the use of Titebond® II weatherproof glue and spar varnish. top together in several ^^ narrow assemblies, letting the glue dry, then gluing and clamping them together to make the full panel. Otherwise, too many wet joints will make the top difficult to clamp up, resulting in shifting — and lots of expletives! I made my top from two pieces of 4V211 wide oak sandwiched around four pieces of S1^" stock. Here's a technique I frequently use to achieve flawless butt joints without worrying if my jointer is set precisely at 90 degrees. I cut my stock to rough width and length, then arrange the boards to alternate the growth-ring patterns (see the Exploded View above). Number the boards so they stay in sequence and mark alternate A's (Away from the fence) and O's (On the fence) along the joint lines on the top face. With each board's top face away from the fence, joint the A edges. Then, with each board's top face on the fence, joint the 0 edges. This way, if your A cuts are 89°, you'll be guaranteed that your 0 cuts will be 91° and you'll end up with a nice flat top. Figure 1: After you've carefully marked all your workpieces, cut the lap joints on the bench legs with a dado set mounted in your table saw. Building the Benchtop Start this project by making the rather massive benchtop (piece 1). If this is your first try at gluing together a large tabletop, save yourself some headaches by gluing the Figure 2: The 45° miters on the bottom aprons are cut on a miter saw. Nibble at the cut to prevent your saw from flinging small pieces of oak across the room. Summer 2004 Outdoor Projects |


